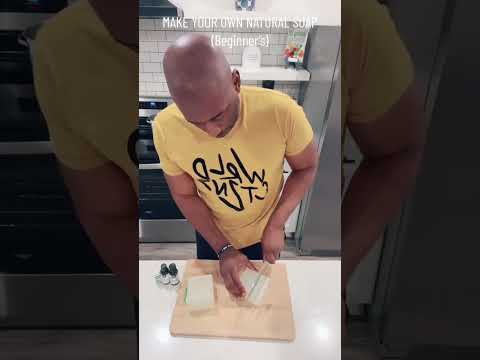
The information provided in this article is intended solely for general informational and educational purposes. It does not constitute medical advice, diagnosis or professional treatment, and should not be considered a substitute for consultation with a qualified doctor or other licensed healthcare professional. Any health-related decisions should be made in consultation with accredited medical professionals.
While efforts have been made to ensure the information is accurate and up to date, no guarantees are given—either express or implied—regarding its accuracy, completeness, currency or suitability. Use of this information is at your own discretion.
It is strongly recommended to consult official sources such as the NHS (National Health Service) or other recognised medical institutions before acting on any information contained on this website or article. Under no circumstances should professional medical advice be ignored or delayed due to content read here.
This content is of a general and informational nature only. It is not intended to replace individualised guidance from a healthcare professional or to establish any doctor-patient relationship. The publication of this information does not imply any professional responsibility, guarantee or obligation on the part of the author or this site.
Have you ever looked at the ingredient list on your soap and thought, “What on earth is that?” It’s crazy how many chemicals can end up in something we use daily, right? The skin is our largest organ, and it absorbs what we put on it. So, why not use something healthier?
Making your own bar soap can be a fun and satisfying way to ensure you know exactly what’s in it. Plus, it gives you control over the scents and textures you love. Imagine crafting a soap with soothing lavender or invigorating citrus—made just for you.
This article will guide you through making homemade bar soap that fits perfectly into your skincare routine. You’ll learn about base ingredients, essential oils, and even some fun add-ins like oatmeal or honey.
Of course, while we’re diving into this hands-on approach to skin care, remember that this content doesn’t replace medical advice. It’s key to consult a healthcare professional before making any major changes to your health routine.
So let’s jump in and explore the wonderful world of DIY soap-making together!
Craft Your Own Luxurious Soaps Using Nature’s Best Ingredients
Craft Your Own Luxurious Soaps
Making your own soap can be a fun and rewarding project. Plus, it allows you to control what goes into it. You know, when you create soap at home, you get to pick the ingredients based on your skin’s needs.
Why Choose Natural Ingredients?
Natural ingredients can be gentler on the skin. For instance, olive oil is known for its moisturizing properties. Coconut oil is also popular because it helps produce a nice lather.
Using plant-based additives can be a great way to infuse your soaps with beneficial properties too. Think about adding things like lavender for fragrance but also for its soothing qualities.
Basic Soap-Making Techniques
The two main methods are hot process and cold process. In cold process soap-making, you mix oils with an alkali called lye. It sounds tricky, but once you understand the steps, it’s quite doable!
If you’re nervous about using lye, look into melt-and-pour kits instead they’re user-friendly and require no special equipment.
Additives That Boost Benefits
- Essential Oils: They smell great and can provide aromatherapy benefits.
- Herbs: Dried herbs like chamomile or rosemary not only add texture but might also help with skin issues.
- Milk: Goat’s milk or coconut milk can make your soap creamier and more nourishing.
- Sugar: Adding sugar in small amounts can give your soap a gentle exfoliating quality.
Scenting Your Soap
If you’re crafting luxurious soaps, fragrance is key! Essential oils come from plants and have aromas that are pleasing. But remember: it’s all about how much you use too much can overwhelm the senses.
Shelf Life and Storage Tips
Your homemade soaps should last a while if stored correctly. Keep them in a cool, dry place away from sunlight to extend their life. If they start to look weird or smell funny, toss them out!
A Note on Skin Sensitivities
The thing is, everyone’s skin reacts differently. While many people love natural soaps filled with goodies from nature, some may find certain ingredients irritating. Always do a patch test before using any new product extensively!
Your Creative Outlet Awaits!
Diving into soap-making opens up countless possibilities for self-expression and creativity! So go ahead—experiment with colors scents and textures that resonate with you personality.
Unlock Your Creativity and Craft Beautiful, Personalized Soap at Home
Unlock Your Creativity with Soap Making
Making soap at home can be a fun and rewarding activity. It’s like cooking but with a twist—you create something that’s not just useful but also unique to you. So, how do you get started?
Understanding the Basics
At its core, soap making involves combining fats or oils with an alkali solution, usually sodium hydroxide, which is called lye. This process is called saponification. Sounds complex, right? But think of it like baking a cake; you mix the right ingredients together in the right way.
Choosing Your Ingredients
You can use various oils for soap making. Popular choices are olive oil for moisturizing or coconut oil for bubbly lather. The type of oil you choose impacts the final feel and scent of your soap.
- Olive Oil: Great for hydration.
- Coconut Oil: Makes bubbles.
- Shea Butter: Adds creaminess.
Also, consider adding fragrances or essential oils to personalize your creations further. Lavender is calming, while citrus scents can be invigorating!
Lye Safety First
Lye can be dangerous if mishandled, so always wear gloves and goggles when working with it. It’s best to measure it out carefully and mix it in a well-ventilated area.
Remember that lye must be added to water—not the other way around—to avoid a dangerous reaction!
Molding and Curing
Once your mixture is done, pour it into molds to set. Plastic or silicone molds work great for beginners. After 24 hours, when it’s solidified, you’ll slice it into bars if needed.
- This stage can feel magical—you created something!
- The soap needs curing for about 4-6 weeks before using it; this allows any remaining lye to neutralize fully.
The Joy of Personalization
Your creativity really shines here! You can add colors using natural dyes or even spices like turmeric for an earthy vibe. Have fun experimenting! Remember that each batch may turn out slightly different due to variations in temperature and ingredient ratios.
A Few Common Myths
- You need fancy equipment: Not true! Basic kitchen tools will usually suffice—think kitchen scale and mixing bowls.
- Bacteria thrive in homemade soaps: This is misleading since proper saponification makes homemade soaps antibacterial by nature!
- The smell will last forever: Fragrance fades over time; store your soaps properly to prolong their scent life.
A Healthier Skin Care Routine?
Making your own soap allows you to control what goes on your skin. You can avoid synthetic additives found in many commercial products—and that’s pretty empowering! Still, everyone’s skin reacts differently; consider testing new ingredients on a small patch first.
Your New Hobby Awaits!
If you’re curious about trying soap-making as part of your health care routine at home—go ahead! It’s not only creative but also gives you insight into what touches your skin daily.. Just remember to have fun with this process; after all—it’s all about bringing out your personal touch while caring for yourself!
Unlock the Secrets to Crafting Luxurious Soaps at Home
Crafting Luxurious Soaps at Home
Making your own soap can be a fun and rewarding activity. It’s like creating art, but you use skin-friendly ingredients instead of paint. Plus, you get to customize it just the way you like! But before diving in, let’s chat about what you need to know.
Understanding Ingredients
Soap is made through a process called saponification. Sound complicated? It really isn’t! Basically, you mix fats with an alkali (a type of strong base). This can be lye (sodium hydroxide) or potash (potassium hydroxide), depending on what type of soap you’re making.
You can use oils like coconut oil, olive oil, or even shea butter. Each brings its own benefits. For instance, coconut oil is great for lathering while olive oil provides moisture. Think of it as picking your favorite toppings for a pizza!
Scent and Color
Add essential oils for fragrance—not only do they smell amazing, but many also offer aromatherapy benefits. Lavender can help with relaxation, while citrus scents are often uplifting.
If you want to color your soaps naturally, consider using herbs or spices like turmeric or spirulina. They give your soap a vibrant hue and keep things chemical-free.
The Process
Starting with cold process soap-making might seem daunting at first, but it’s pretty manageable once you get the hang of it. You’ll need safety gear since lye can be dangerous if mishandled—gloves and goggles are must-haves!
First things first: measure your ingredients precisely. Soap-making is kind of like baking; a small difference in measurements could lead to unexpected results.
- Mix the lye with water (always add lye to water—not the other way around).
- Heat your fats until melted.
- Combine both mixtures when they’re at similar temperatures—usually around 100°F (37°C).
- Blend until “trace”—that means when it thickens enough that drips on top leave a trace.
- Add any scents or colors before pouring into molds.
Curing Time
Your soap will need time to cure after molding—about four to six weeks typically. Curing helps develop that nice hard bar and ensures all the lye has turned into soap.
During curing, store your soaps in a cool dry place; humidity isn’t friendly here! Once they’re cured properly, they’re ready for use—as gifts or for yourself!
Packing It Up Right
If you’re giving them away as gifts—or just want something fancy for yourself—consider wrapping them nicely in paper or boxes that show off their beauty.
Making homemade soap lets you control what goes onto your skin and avoids unwanted chemicals often found in commercial products. And hey—there’s joy in creating something unique just for yourself or someone special!
A Few Precautions
Your skin’s reactions may vary depending on the ingredients used. Patch testing any new soap on a small area first is always smart; staying aware of allergies is crucial too.
()
The whole process may take some practice to master well, so don’t be discouraged by initial hiccups—it’s part of learning!
Making your own bar soap can be a fun and rewarding experience. It’s not just about crafting something unique; it can also enhance your skincare routine in meaningful ways.
First off, when you create your own soap, you have total control over the ingredients. Many commercial soaps contain synthetic additives or harsh chemicals that can irritate sensitive skin. By choosing natural ingredients, like olive oil or coconut oil, you can create a gentler product that suits your skin’s needs.
Think about it: when you make soap at home, you’re essentially cooking for your skin! You know exactly what’s going in there—no mystery components. This transparency is empowering and allows you to customize scents and properties based on what your skin craves. Adding essential oils like lavender or tea tree can bring both nourishment and delightful fragrances.
Another aspect to consider is how making bar soap allows for sustainability. Many store-bought soaps come in plastic packaging that’s harmful to the environment. When you make your own, you can use eco-friendly materials and reduce waste.
Lastly, this process can be quite therapeutic. The act of blending ingredients and watching them transform into soap is satisfying and calming—a great stress reliever! Plus, sharing handmade soap with friends or family adds an extra layer of joy to the experience.
In essence, crafting your own bar soap isn’t just about cleanliness; it’s a way to nurture yourself holistically while embracing creativity and environmental consciousness.